Blog Archive

Powered by Blogger.

Wednesday, February 20, 2013

Etsy Shop

I just opened my first Etsy shop, Shattered Starlight! I am so excited. Right now I only have a few pieces up that I made earlier this summer when the creativity bug bit me. I'll be expanding soon and adding lots of new things if I'm able to get this going. I won't have too much up, but I'd like to do enough to make some extra cash while I go to school. 
To take a look at my Etsy shop CLICK HERE! <-----


These are the pieces I have up so far. Let me know what you think or would like to see soon! 


Monday, January 21, 2013

Revlon Photoready Airbrush

     When I ran out of my regular foundation, I decided to try something new. I had seen this a few times and always thought it seemed really interesting. They have 8 different shades to choose from. Though, they don't have many options on the darker end of the spectrum. I picked up Shell, which is actually a little too dark for me, but I was worried the lightest one would be too light. It comes in a cool little "squirt" type bottle and sprays out literally like a mousse. You can find this at almost any drugstore for around $11. The only problem, is that the pump is really sensitive and dispenses a lot of product. The smell is also less than desirable; it's almost a vinegary scent. It's only heavily scented when you first put it on. By the time I put my setting powder on, I can't smell it anymore. When you first squirt it out, it's bubbly and deflates to the touch. This high coverage foundation is blends easily and really does give you an airbrush type finished when applied with a stippling brush. Overall this is a pretty good foundation and is actually kind of fun to put on. It lasts all day, and covers up all of those blemishes you don't want to show through. 

 Directly out of the bottle. 

This is what it looks like just stippled onto my skin. 


Lush Lip Scrub

    A few months ago, my mom came to visit for the weekend for some mother daughter bonding time. We decided to make a trip to Fashion Island in Newport. Probably one of my favorite places to shop! We went to the Lush store for the first time.. oh my gosh, I fell in love with that store. I wanted to buy EVERYTHING. Some of you know that that can be quite detrimental to your wallet. Ouch! Lucky for me, my mom was awesome enough to buy me a lip scrub that I had long been wanting to try. We also split a Dream Cream, which is absolutely amazing... but that's for another post. 

    I love a good lip scrub. During those winter months, your lips are susceptible to becoming dry and flaky.. gross. Exfoliating those precious lips of yours can keep them soft and supple even during the harshest of weather. Lush's lip scrubs are perfect for sloughing off any dead skin that can be hanging out. They're made with all natural ingredients and the smell is AMAZING. The ingredients are just sugar, castor oil, and bubblegum flavoring. They also have a mint flavored scrub as well as a chocolate flavored one; both of which, also smell delicious. All you need to do is scoop a little bit on a clean finger tip and massage into your lips in a circular motion. Wipe (or lick) off, put on a layer of moisturizing lip balm, and show off your new and improved pout! 


MAC Swatches and Reviews

Blanc Type, Trax, Tempting, Cork, Beauty Marked, Carbon.

People are always asking me what eyeshadows I recommend getting from MAC. MAC's huge selection of eyeshadows can be both a blessing and a curse. Truth is, when faced with rack full of glorious eyeshadows, it's hard to decide which ones to get, especially since most of us can't afford to buy every single one. I love MAC products, however, I have limited myself to investing in shades that can be used for different looks, from every day, to nights out. These are just a few of my favorite shades and I use them on an almost daily basis (as you can tell, one has already hit pan). The good news is, though, these eyeshadows last for FOREVER! I've had three of these for over three years already. 


Blanc Type
Matte
Blanc type is an eggshell like matte color. I tried to get it to swatch right, but it came out a little differently so I could get it to show up in the picture. This is a really good base color, or can be used as a highlighter. I was looking for a matte highlighter since I have so many shimmery ones, and this one is perfect. I can use it with any of my eyeshadow combinations. If you're looking for a "staple" shade in your makeup bag, this is a good one to get. 


Trax 
Velvet

Trax is a light plum color with flecks of gold shimmer. It's a really soft color that's perfect for every day, day time use. As you can tell, I went through a phase where I literally wore this shade every day. I LOVE it. 


Tempting
Lustre

I am also in love with this color, and I do currently use it every day. It's a great crease color. It's a shimmery warm goldish brown. It's dark enough for a defining crease color, yet light enough for an all over color. So whether you're into dramatic makeup, or are just dabbling in the makeup world, this is the perfect color as well. 


Cork
Satin

In my opinion, Cork is the matte version of Tempting. This is one of my newer additions. Just like with Blanc Type, I was looking for a matte brown, since I have a lot of shimmery ones. This color is a good crease color as well. It's soft and subtle, yet buildable. I like to use Tempting deeper into the crease and use Cork to blend and extend up higher up near my brow bone, since it's a bit more subtle. It's a great one to have in your collection. 


Beauty Marked
Velvet

This color is basically a matte black with plum and gold flecks spread throughout. The black doesn't come on too intense so it's really easy to build or tone down with a little blending. It's a really fun color for a night out. 


Carbon
Matte

Carbon is just a simple matte black. I can honestly say this is the best black ever. I use black shadow every day and had tried every drugstore brand out there. I finally broke down and bought the MAC's. This shadow is so pigmented and blends so smoothly. I was having a problem with my black shadows fading away throughout the day, and with this one, that isn't a problem anymore. 


These are just my personal opinions on the MAC shadows that I own. I hope it helped anyone trying to figure out what they want to get next. 


Sunday, January 20, 2013

Butler Please

Essie- Butler Please

I had my eye on this polish for months!!! Every time I went to Target, I had to stop myself from picking it up. Luckily, my mom bought it for me for Christmas. Yay!! It is the perfect blue. It's a completely unique color. I don't know what it is, but this polish comes out a bit matte. A clear coat is a quick fix for that. This color even looks awesome with a coat of a clear mattifying polish. Definitely my new favorite. 


Flip Flop Fantasy

China Glaze- Flip Flop Fantasy

I have this new nail polish obsession. I picked this one up the other day at Sally's and absolutely love it. The only problem is, it comes out a bit dull and streaks a little bit. But with a clear coat, it's the perfect color for your nails! 


Chicken and Sausage Carbonara


My favorite dish to order at Olive Garden is the Chicken and Shrimp Carbonara. SO good, but so expensive. After finding a good copycat recipe for Olive Garden's dish, I made my own changes, and it came out great. Being a budgeting college student, I switched up some of the ingredients for things I already had on hand or less expensive alternatives. It tasted just as great as when I used the real ingredients, and my roommate absolutely loved it!


Serves 6

What You Need:
1/2 box pasta (spaghetti, linguine, etc.)
1/4 teaspoon salt
2/3 cup extra virgin olive oil
2/3 cup hot water
3/4 tablespoon italian seasoning
3/4 tablespoon garlic powder
2 large boneless chicken breasts 
4 small garlic cloves
1/2 cup 2 tablespoons (1 1/4 sticks) butter
4 strips of thick bacon 
2 italian sausages
2-4 tablespoons all-purpose flour
3/4 cup parmesan cheese, grated
2 cups heavy cream
2 cups milk
2 1/4 tablespoons romano cheese, grated
2 1/4 tablespoons parmesan cheese, grated
1 1/3 cups mozzarella cheese, shredded
1/2 cup panko
1 1/8 teaspoons garlic powder
1 1/8 tablespoons butter, melted


What To Do (And What I Actually Used):

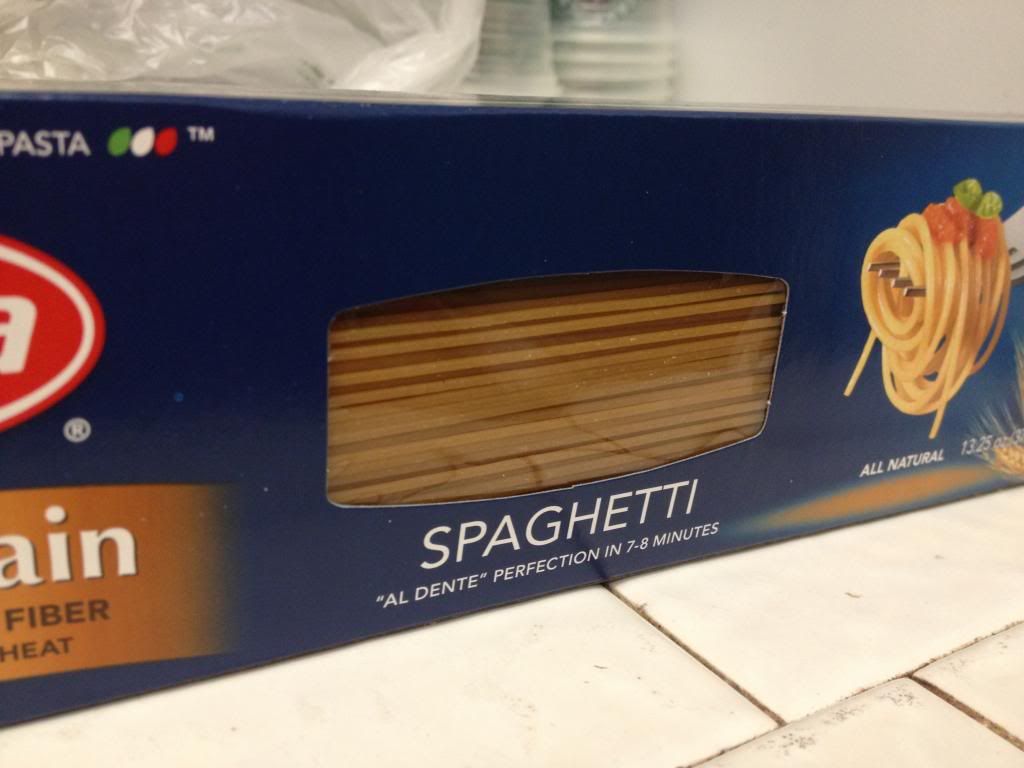
1. Boil your pasta according to the directions on the package! I used whole grain spaghetti, but you can use any kind you well please. 
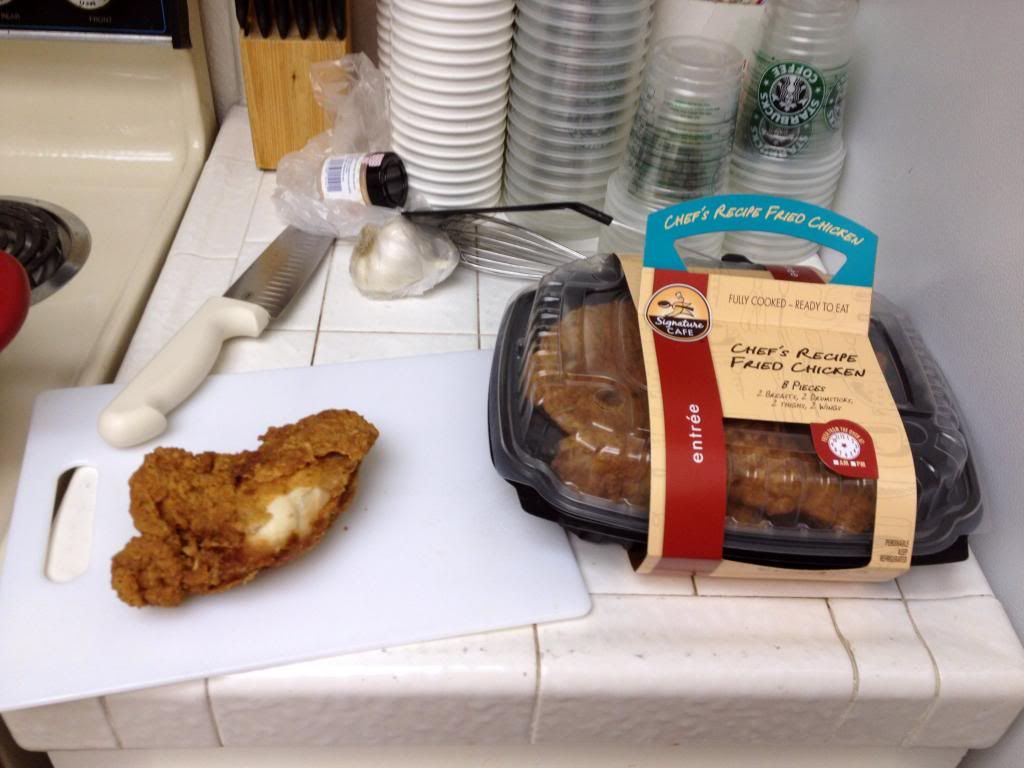
2. Alright, here's where my substitutions come into play. I used a pack of pre-cooked fried chicken, because, quite frankly, it's cheaper. Normally I would have used a rotisserie chicken, but the fried chicken happened to be on sale this week. Both are good less expensive alternatives. Whether you choose these options, or decide to cook up raw chicken breasts, cut up your chicken into small pieces. make sure there are NO bones.


3. Whisk hot water, olive oil, italian seasoning, and garlic powder together. Put your chicken into his mixture and allow to marinade in the refrigerator while you finish up the rest of your recipe. It may sound a bit silly to put cooked chicken into a marinade, but it really does change the flavor, cooked or raw.


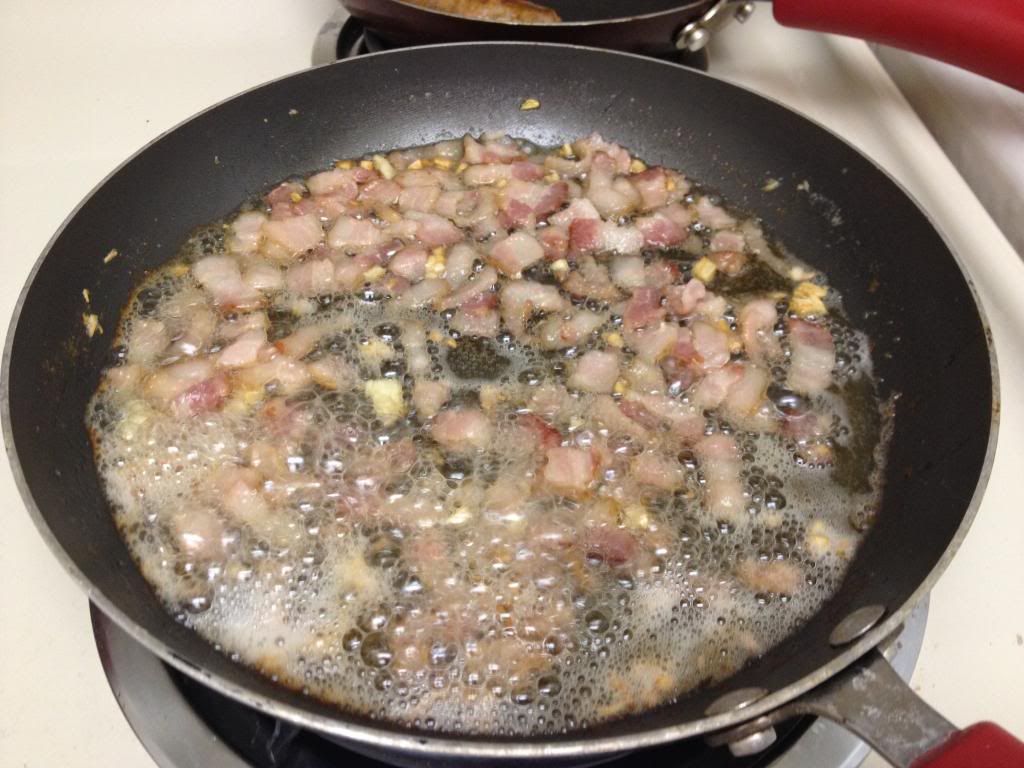
4. Chop up your bacon strips into little pieces and mince garlic cloves. 


5. Melt 2 tablespoons of butter in a skillet. 

6. Add bacon and garlic to the butter on medium heat. Be careful not to burn the butter.


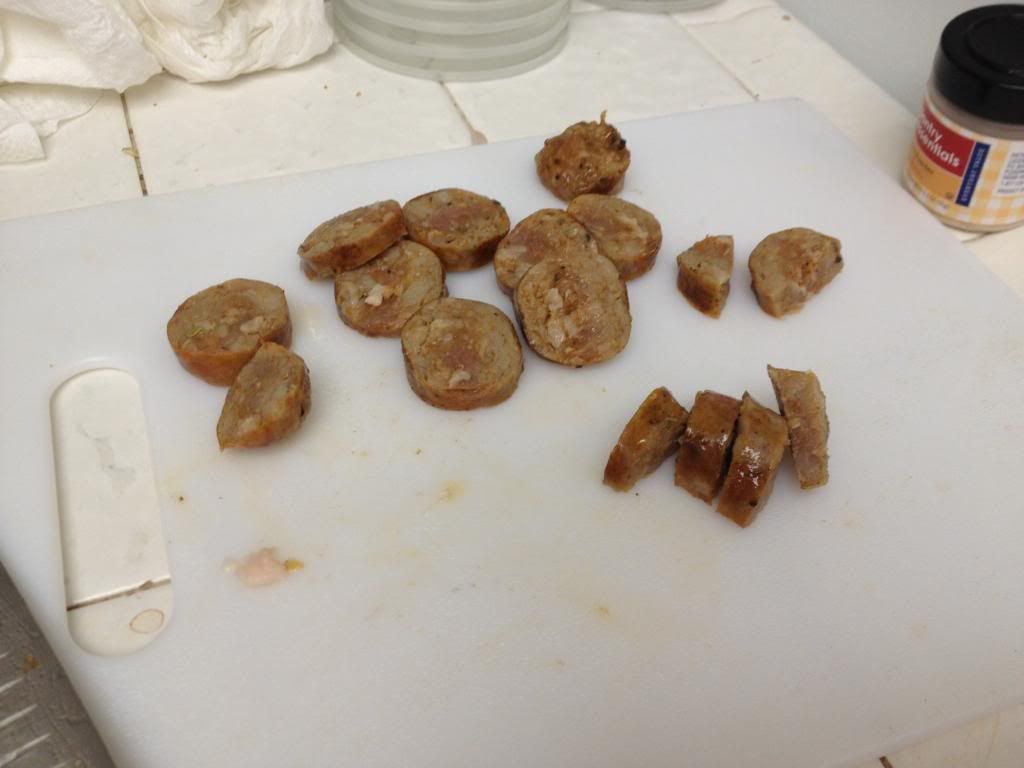
7. Meanwhile, cook up sausages. Slice and cut disks in half.


8. Once the bacon is mostly cooked. Add the sausage to the mixture and allow to continue cooking for a few more minutes, making sure bacon and sausages are completely cooked through.


9. Melt 1/2 cup of butter in a large pot.


10. Add half and half, milk, flour, and parmesan cheese to the melted butter. Make sure to whisk continuously so that the sauce doesn't get lumpy. Start by adding only 2 tablespoons of flour, and add more as needed. As the sauce heats up, it'll get thicker. 


11. Once the sauce has thickened, add the bacon and sausage mixture and mix. 


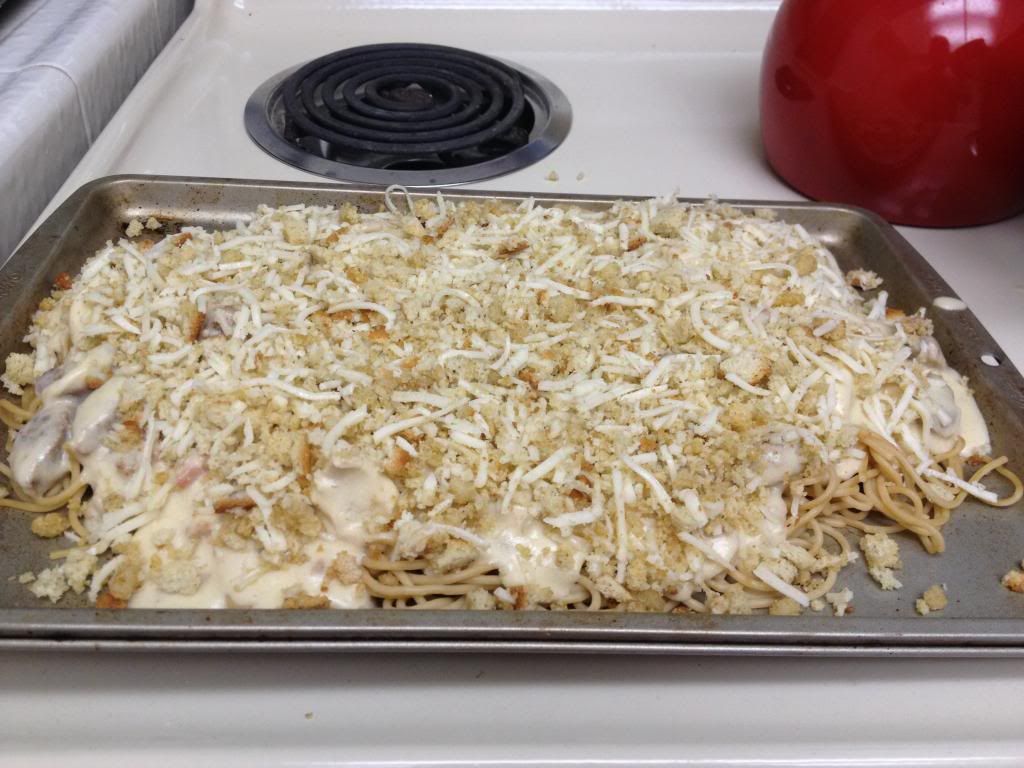
12. Put pasta on a cookie sheet and pour desired amount of sauce over it. I ended up having a lot of sauce left over. I'll probably end up freezing it, for next time. 


13. In a small bowl, add melted butter and bread crumbs. I used crushed seasoned bread pieces for stuffing, but obviously panko is way better. 

14. Spread this mixture over the top of your sauce.


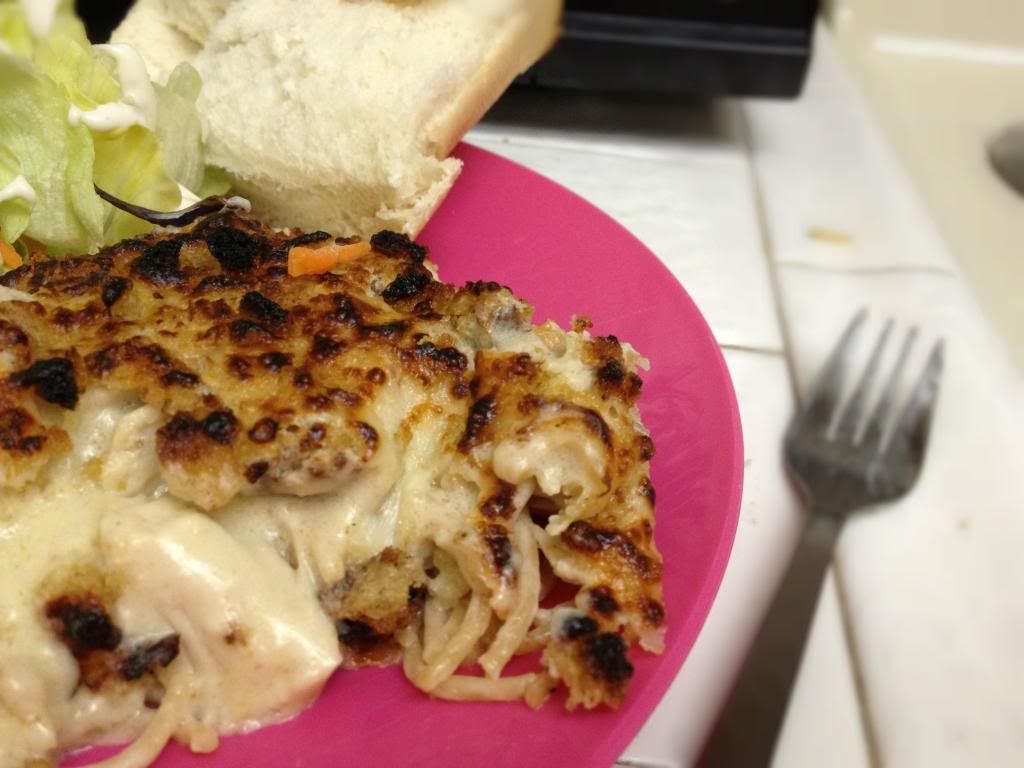
15. Set your oven to broil and put your pasta in the oven. Let broil until the top is golden brown and crispy. Obviously, a bit less "golden brown" than the one pictured above. (Apparently the ovens in our on campus apartments are infernos. Don't worry, it was still delicious.) It should only take a few minutes.


16. Serve up with some garlic bread and salad, and you have yourself an amazing meal! 


Saturday, January 19, 2013

It's the Little Things...

After months of searching for new phone cases, I finally found THE ones. I had been looking at all kinds of cases, but I wasn't really willing to drop $20+ on a phone case I'd soon want to change. I decided to check amazon, and lo and behold, I found these for LESS  than $5 each. Not only are they super cute, but they're the EXACT same cases that I had been looking at. Needless to say, I was a happy camper. So, just in case you're in the same spot I was and haven't already thought of it... go to Amazon, and don't look back!

Monster Cookies


     A while ago, my mom's best friend made cookies for a group trip that our families had taken. Unfortunately, I was off at school and was unable to go. However, I did hear my mom and little brother rave about her best friend's cookies. We soon asked her for the recipe, and I told my mom that I would have to experience these for myself. The next time I made a trip home, my mom and I whipped up a batch of these cookies, and let me tell you, they were DELICIOUS. These aren't "Oh, I'll just have one" type of cookies. They are "Oh my goodness, hide them before I devour them all myself" cookies. Brace yourselves, people; you were warned. I don't know where she got this recipe, but props to whoever thought of these amazing little nuggets. This simple recipe is definitely a crowd pleaser each and every time. They're off the cookie platter, just as fast as you can put them on!

What You'll Need:
1 1/2 cups peanut butter (I use natural, but any kind would work)
1 cup packed light brown sugar
1 cup granulated white sugar
1 stick unsalted butter, softened
3 large eggs
1 tablespoon vanilla extract
4 1/2 cups quick cooking oats
2 teaspoons baking soda
1 cup semi-sweet chocolate chips
1 cup M&M's plain chocolate candies- If you can find the baking M&M's, it's an added bonus. Otherwise, regular M&M's would work fine. 


What To Do: 
1. Preheat oven to 350°F and get your cookie sheets ready for deliciousness to be thrust upon them. (Yes, that just happened)

2. In a large bowl, combine softened butter with the brown and white sugar. Mix in peanut butter. Make sure everything is mixed together really well. An electric mixer would be really helpful with this. '
3. Mix in the eggs and vanilla. 
4. Once combined, throw in the oats and baking soda, and keep mixing. 
5. Stir in the chocolate chips and M&M's enough to distribute evenly throughout the dough. 
6. Use an ice cream scoop to scoop out mounds of dough and place on your cookie sheets about 1 or 2 inches apart. Of course, you could just use a spoon. I like an ice cream scoop because it gives you pretty consistently sized cookies.
7. Bake about 12 minutes. Be careful not to over bake them. Because they're bigger and quite dense (hence MONSTER cookies), it may take a few additional minutes to fully bake them. Just keep checking on them. 
8. Let them cool... if you can avoid temptation for that long. 


Does anyone else have their own variations?